Home
/ How To Photoshop Hair - Press control+t (windows) or command+t (macos) to transform and distort the hair to better match the image.
How To Photoshop Hair - Press control+t (windows) or command+t (macos) to transform and distort the hair to better match the image.
How To Photoshop Hair - Press control+t (windows) or command+t (macos) to transform and distort the hair to better match the image.. Keep in mind that when doing hair color changes in photoshop it is a lot easier to go from light hair colors to dark. Some hair styles will have gaps where hair doesn't fall correctly. You can use the quick selection tool, lasso, marquee, or the object selection tool if you're using photoshop cc 2020. Select the clone stamp tool (s). When something in an image has a hard, defined edge, like a mug or a car, we can turn to super accurate tools like the pen tool to make quick work of the selection.
But when something has a soft and detailed edge, like a wild head of hair, things get tricky. Photoshop tutorial by capriccio originally posted on worth1000. Keep in mind that when doing hair color changes in photoshop it is a lot easier to go from light hair colors to dark. Click and drag the radius slider towards the right. You can use the quick selection tool, lasso, marquee, or the object selection tool if you're using photoshop cc 2020.
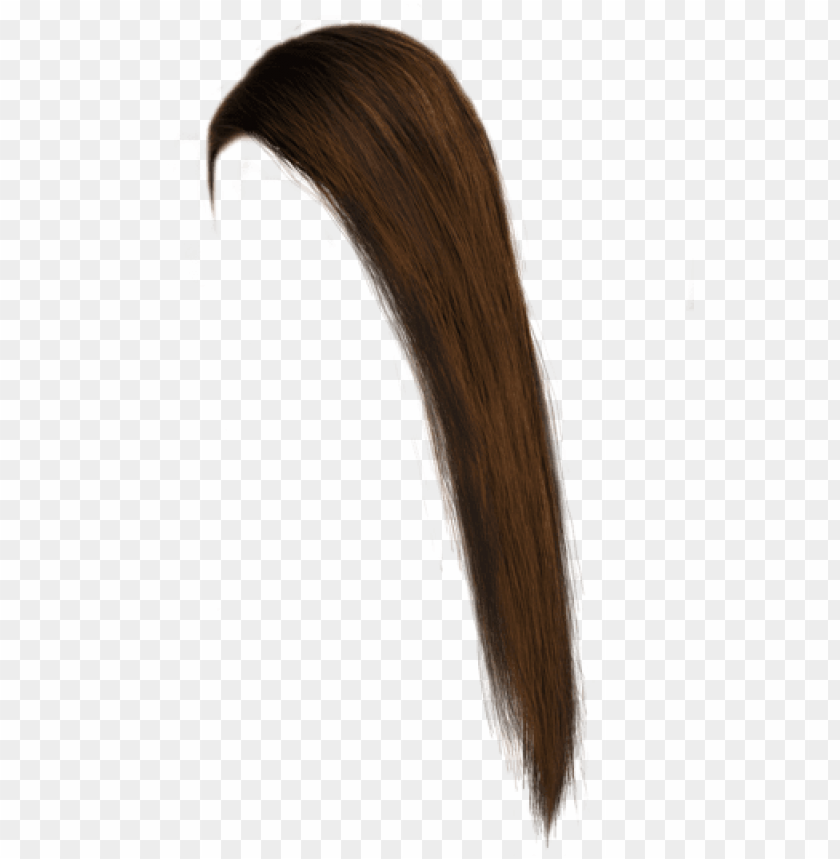
Hair Png Photoshop Long Brown Hair Png Image With Transparent Background Toppng from toppng.com Select the clone stamp tool (s). Hair continues to be one of the most challenging things to select and cut out in photoshop. Continue moving the mouse around the hairstyle until you reach the starting point, then click the original dot. We used the lasso tool and left the edges of the hair outside the selection area — make sure you don't include parts of the background in your selection. Click a point very close to the hair, release the mouse button, then move the mouse slowly around the entire hairstyle (not including the face). Photoshop offers a number of tools that makes cutting an object out of a photo easy — that is, until you get to the hair. This works best on soft backgrounds with very little texture. Use the left and right bracket keys ( ) on the keyboard to resize your hair brush tip and match it to the portrait image.
You can do this with any of the selection tools, preferably one that you feel the most comfortable with.
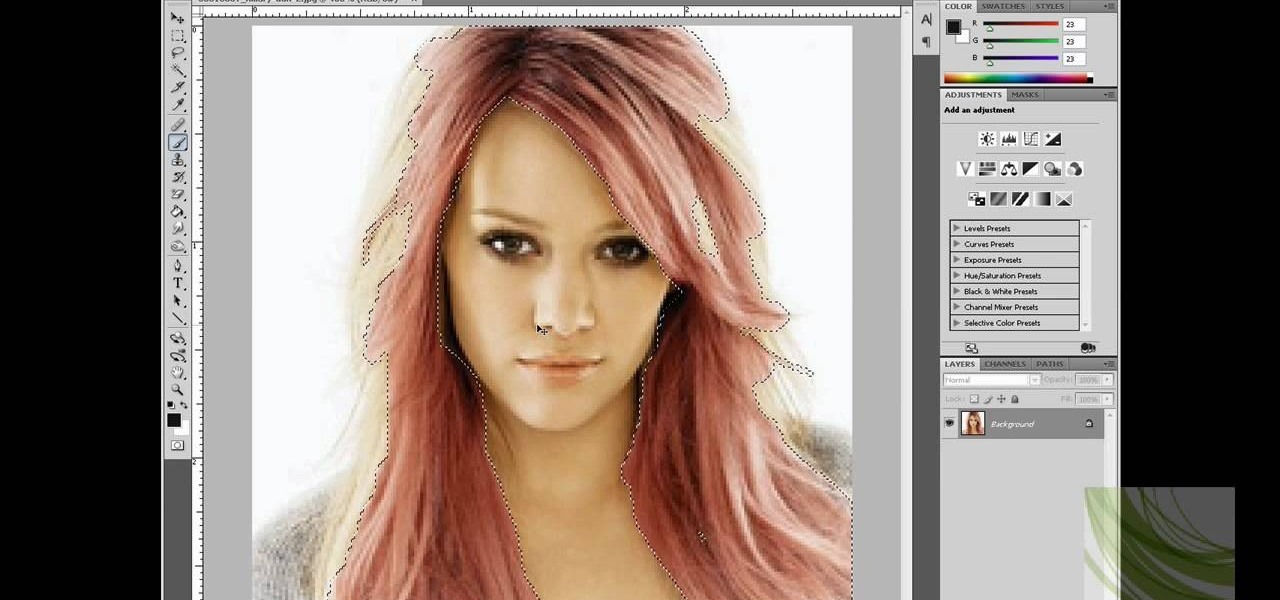
Use a soft brush to fade out the hair where it meets the background. Unlike older graphic design programs, photoshop 7 gives the designer the ability to add hair strand by strand to create truly dynamic and realistic effects. Draw a selection around the hair. Paint more details for the hair by experimenting with color and using a tiny brush to mimic the hair strands. The following 4 tips on how to edit hair will help you achieve much better results when it comes to hair retouching in photoshop. In this case, the subject's bangs have a few areas where the hair isn't filled in. Click and drag the radius slider towards the right. How to fill in gaps in hair. Duplicate the hair layer and vary the contrast using curves or levels, then vary the opacity or blending mode of the adjusted layer as above. In this photoshop tutorial, you will learn to composite hair into a photo to give a person a new hairstyle. The path will be selected around the photo. Paint over the edges of the hair and photoshop will make a perfect selection of the hair. Paint warm light on the outer edges of the hair using a layer set to overlay.
Fill in the background with a beautiful peach gradient. You can use the quick selection tool, lasso, marquee, or the object selection tool if you're using photoshop cc 2020. Photoshop tutorial by capriccio originally posted on worth1000. We begin the list with a complete package that offers us 10 brushes with options for all hair types. Click on the hair to sample a hair color.
How To Change Hair Color In Adobe Photoshop Photoshop Wonderhowto from img.wonderhowto.com You can see a new dialogue box put 0.5 on the feather radius and click ok. In the top bar click on the brush thumbnails and select a rounded brush. Draw a selection around the hair. Photoshop tutorial by capriccio originally posted on worth1000. Photoshop offers a number of tools that makes cutting an object out of a photo easy — that is, until you get to the hair. Then, click the select and mask button to enter the workspace where most of the work to finesse the hair selection will occur. Continue moving the mouse around the hairstyle until you reach the starting point, then click the original dot. This works best on soft backgrounds with very little texture.
We used the lasso tool and left the edges of the hair outside the selection area — make sure you don't include parts of the background in your selection.
Set the size to just 1px bigger than the size of a single hair in your picture (in this case is 7px) and bring down the hardness to 95%. 2 create a brush with a new tip in photoshop. Keep in mind that when doing hair color changes in photoshop it is a lot easier to go from light hair colors to dark. Click on the hair to sample a hair color. Some hair styles will have gaps where hair doesn't fall correctly. After opening the image add a new layer. Continue moving the mouse around the hairstyle until you reach the starting point, then click the original dot. Also, pressing j from the keyboard, you can take the patch tool. Click a point very close to the hair, release the mouse button, then move the mouse slowly around the entire hairstyle (not including the face). Draw a selection around the hair. Use the left and right bracket keys ( ) on the keyboard to resize your hair brush tip and match it to the portrait image. In this case, the subject's bangs have a few areas where the hair isn't filled in. Paint more details for the hair by experimenting with color and using a tiny brush to mimic the hair strands.
Click once to paint hair on the new layer. Then, click the select and mask button to enter the workspace where most of the work to finesse the hair selection will occur. Set the size to just 1px bigger than the size of a single hair in your picture (in this case is 7px) and bring down the hardness to 95%. Learn this powerful technique to change hair color in photoshop! Select the clone stamp tool (s).
Remove Background Around Hair Using Photoshop By Amarjyothi Fiverr from fiverr-res.cloudinary.com Unlike older graphic design programs, photoshop 7 gives the designer the ability to add hair strand by strand to create truly dynamic and realistic effects. This works best on soft backgrounds with very little texture. You can use the quick selection tool, lasso, marquee, or the object selection tool if you're using photoshop cc 2020. Click a point very close to the hair, release the mouse button, then move the mouse slowly around the entire hairstyle (not including the face). Click on the hair to sample a hair color. Also, pressing j from the keyboard, you can take the patch tool. Keep in mind that when doing hair color changes in photoshop it is a lot easier to go from light hair colors to dark. The following 4 tips on how to edit hair will help you achieve much better results when it comes to hair retouching in photoshop.
Look at the menu bar on the left side & pick the clone stamp tool & apply the below modification.
Also, pressing j from the keyboard, you can take the patch tool. You can use the quick selection tool, lasso, marquee, or the object selection tool if you're using photoshop cc 2020. Rather than paint in individual hair strands, photoshop hair brushes provide a series of curls and ringlets that can help generate a completely new outline. To achieve this, it will use the contrast between hair and background. Retouching hair can make a huge difference in a photo, and that's why learning proper editing techniques can be quite useful. Select the clone stamp tool (s). Press control+t (windows) or command+t (macos) to transform and distort the hair to better match the image. To add more of the hair to your selection, click on the radius slider and begin dragging it towards the right: Fill in the background with a beautiful peach gradient. Subscribe to my channel here: If you're trying to fix a hair on the face or clothing, skip this method and use one of the previous two. Make a selection beside the hair area again, selecting with the background copy layer, keep the patch tool from the toolbar menu. Without having to clone out each hair, in the tutorial, learn how.